Custom form validation
This tutorial shows you how to create custom form validations, using the mage/validation library, before submitting it to the server.
This allows the customer to enforce data validation rules before submission, which improves the user experience and user interface accessibility.
Initiating validation
There are several ways to initiate form validation as described in Initializing JavaScript topic.
Using the data-mage-init attribute
1
2
3
<form id="my-form" data-mage-init='{"validation": {}}'>
    ...
</form>
Using the text/x-magento-init script type tag
1
2
3
4
5
6
7
<script type="text/x-magento-init">
    {
        "#my-form": {
            "validation": {}
        }
    }
</script>
Form validation rules
All available Magento validation rules may be found in validation/rules.js.
Additionally, you may also use any available jQuery validation rules.
Defining validation rules
There are couple of ways to define validation rules for a form field.
As a data-validate attribute
1
<input id="field-1" ... data-validate='{"required":true}'/>
As an attribute
1
<input id="field-1" ... required="true"/>
As a class name
1
<input id="field-1" ... class="input-text required-entry"/>
Using data-mage-init
1
2
3
<form ... data-mage-init='{"validation": {"rules": {"field-1": {"required":true}}}}'>
    ...
</form>
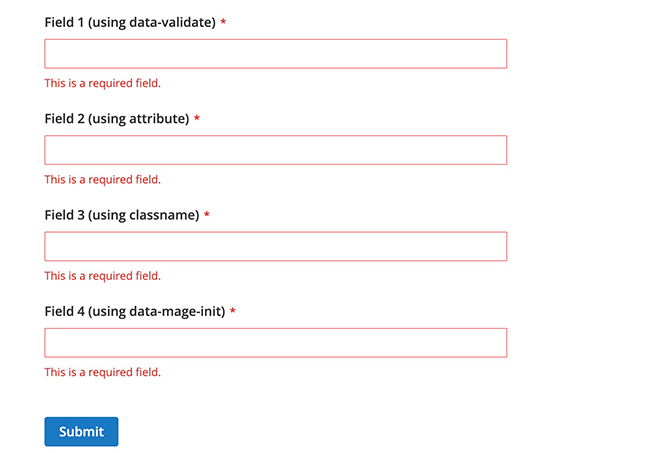
Examples
Adding the validation for a form
Here are examples of all available ways of validating the form fields.
1
2
3
4
5
6
7
8
9
10
11
12
13
14
15
16
17
18
19
20
21
22
23
24
25
26
27
28
29
30
31
32
33
34
35
<form class="form" id="my-form" method="post" data-mage-init='{"validation":{"rules": {"field-4": {"required":true}}}}'>
    <fieldset class="fieldset">
        <div class="field name required">
            <label class="label" for="field-1"><span>Field 1 (using data-validate)</span></label>
            <div class="control">
                <input name="field-1" id="field-1" title="Field 1" value=""  class="input-text" type="text" data-validate='{"required":true, "url": true}'/>
            </div>
        </div>
        <div class="field name required">
            <label class="label" for="field-2"><span>Field 2 (using attribute)</span></label>
            <div class="control">
                <input name="field-2" id="field-2" title="Field 2" value="" class="input-text" type="text" required="true"/>
            </div>
        </div>
        <div class="field name required">
            <label class="label" for="field-3"><span>Field 3 (using classname)</span></label>
            <div class="control">
                <input name="field-3" id="field-3" title="Field 3" value="" type="text" class="input-text required-entry"/>
            </div>
        </div>
        <div class="field name required">
            <label class="label" for="field-4"><span>Field 4 (using data-mage-init)</span></label>
            <div class="control">
                <input name="field-4" id="field-4" title="Field 4" value="" class="input-text" type="text"/>
            </div>
        </div>
    </fieldset>
    <div class="actions-toolbar">
        <div class="primary">
            <button type="submit" title="Submit" class="action submit primary">
                <span>Submit</span>
            </button>
        </div>
    </div>
</form>
Result
As a result, the form gets validated before sending data to the server for processing.