Custom VCL to bypass Fastly
You can create a custom VCL snippet to bypass Fastly caching and submit requests directly to the origin server, for example to determine whether site issues are caused by caching, or to troubleshoot headers. You can configure the snippet to bypass Fastly for requests from a specific IP address or URL.
We recommend testing custom VCL configurations in a Staging environment before merging them into a Production environment.
Prerequisites
-
Ensure that you are running the latest version of the Fastly CDN module for Magento 2. See Upgrade the Fastly Module.
-
Verify the environment configuration for the Fastly service. See Check Fastly caching.
-
You must have Admin credentials to access the Magento Cloud Staging and Production environments.
To bypass Fastly and submit requests to the origin server:
-
Log in to the Magento Admin UI.
-
Click Stores > Settings > Configuration > Advanced > System.
-
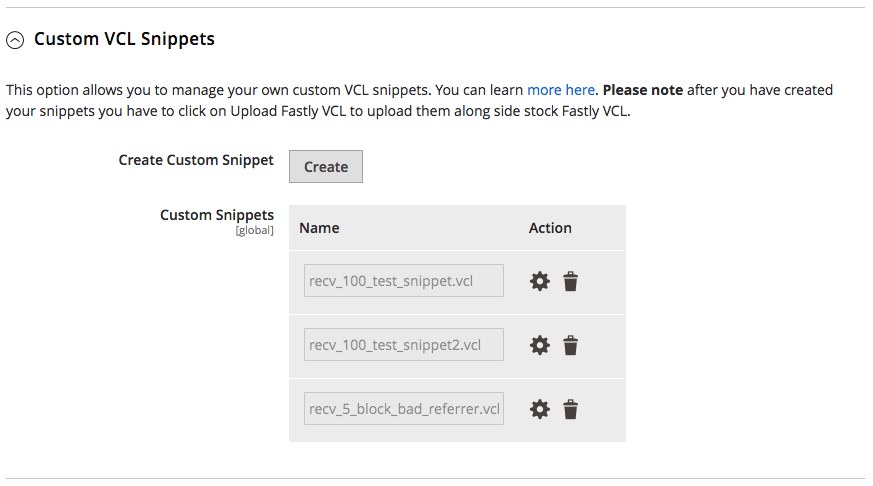
Expand Full Page Cache > Fastly Configuration > Custom VCL Snippets.
-
Click Create Custom Snippet.
-
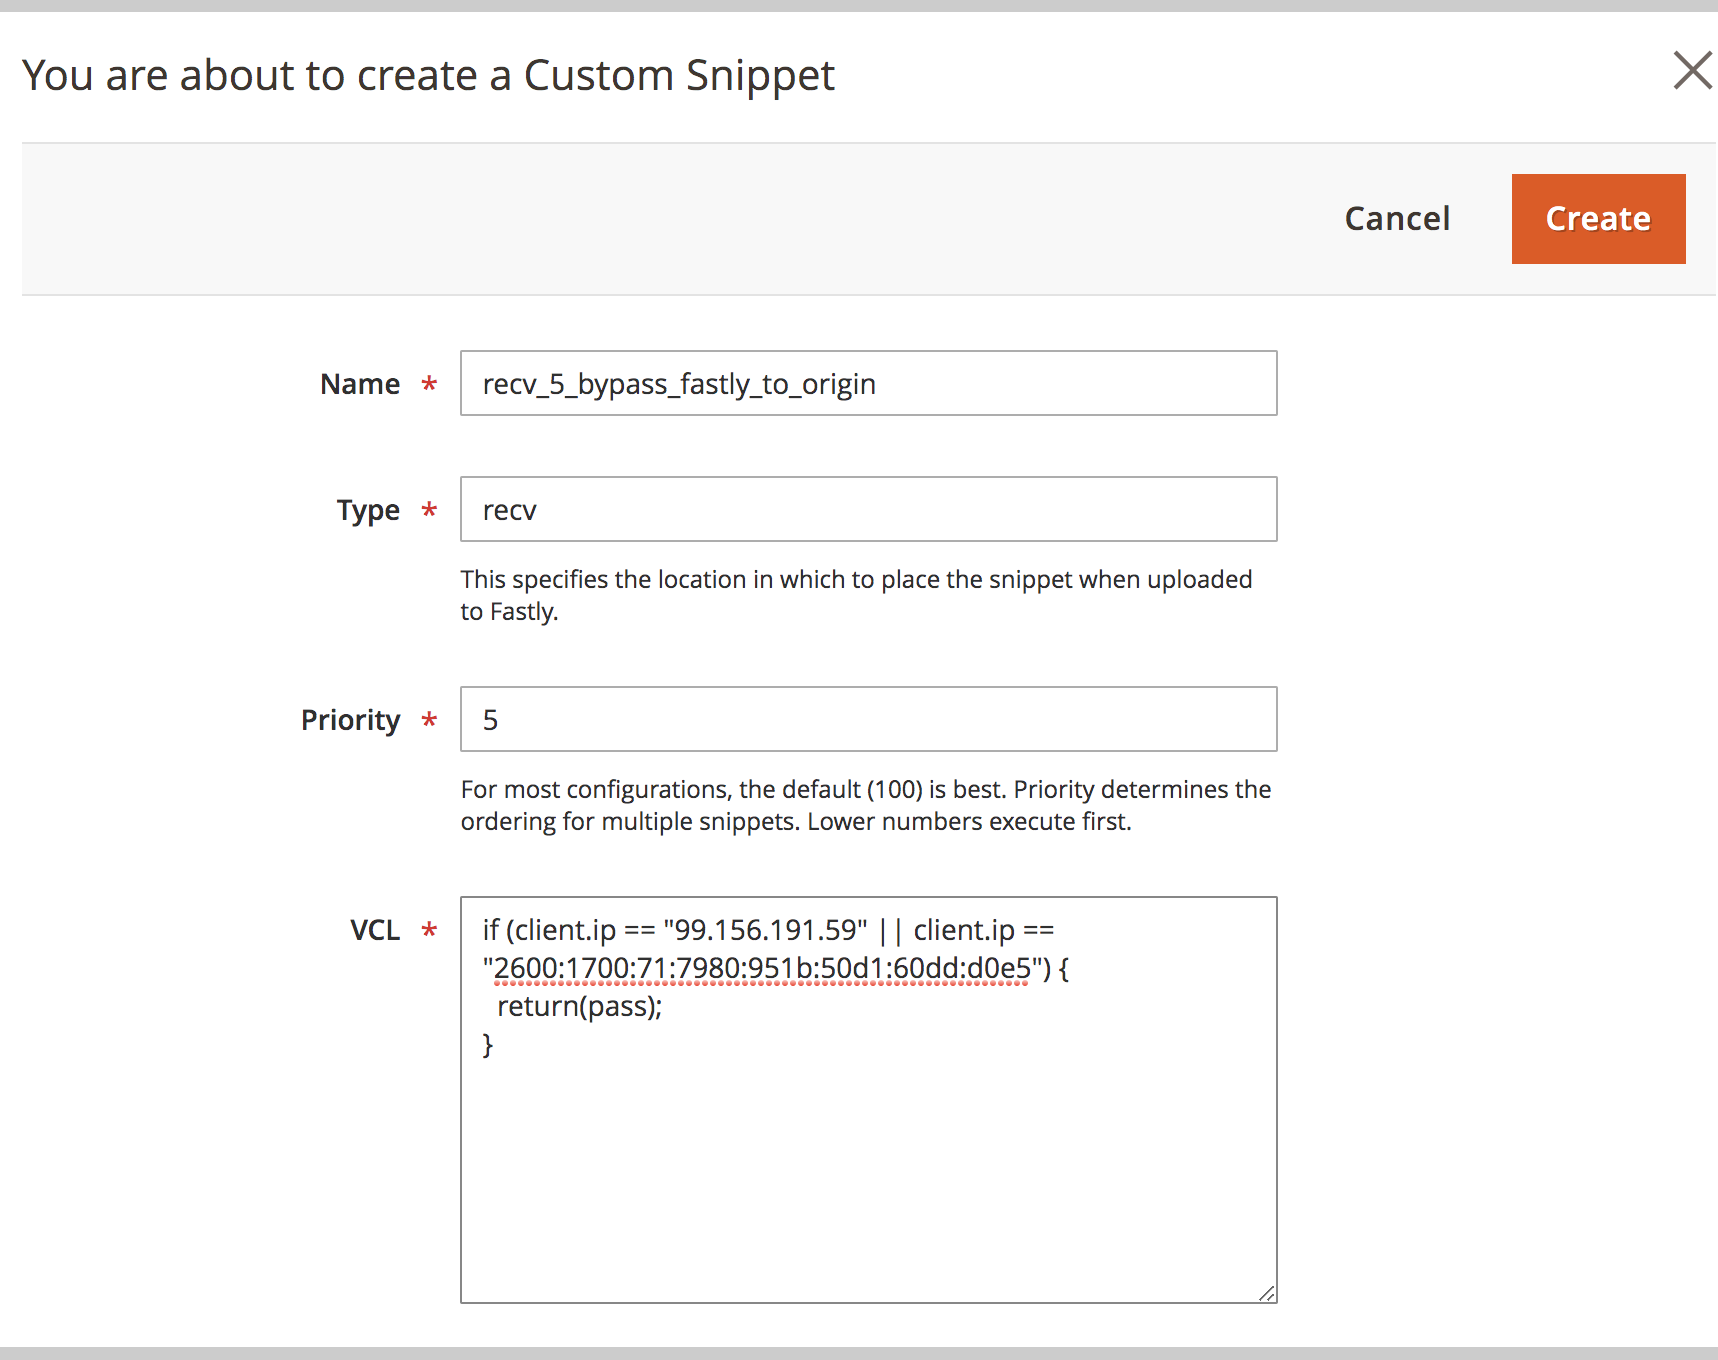
Add the VCL snippet values:
-
Name —
bypass_fastly -
Type —
recv -
Priority —
5 -
VCL snippet content —
The following example bypasses Fastly for a specific IP address:
1
2
3
if (client.ip == "<Your IPv4 IP address>" || client.ip == "<Your IPv6 IP address>") {
  return(pass);
}
The following example bypasses Fastly for a specific URL pattern:
1
if (req.url ~ "/media/feeds/GoogleShoppingHiVisNew.xml") {  return (pass);}
For an exact URL match, use the
==operator instead of the~operator. See the Fastly VCL reference for details.
-
-
Click Create.
-
After the page reloads, click Upload VCL to Fastly in the Fastly Configuration section.
-
After the upload completes, refresh the cache according to the notification at the top of the page.
Fastly validates the updated VCL version during the upload process. If the validation fails, edit your custom VCL snippet to fix any issues. Then, upload the VCL again.
Modify the custom VCL snippet
-
Log in to the Magento Admin UI.
-
Click Stores > Settings > Configuration > Advanced > System.
-
Expand Full Page Cache > Fastly Configuration > Custom VCL Snippets.
-
In the Action column, click the settings icon next to the snippet to edit.
-
After the page reloads, click Upload VCL to Fastly in the Fastly Configuration section.
-
After the upload completes, refresh the cache according to the notification at the top of the page.
The Custom VCL snippets UI option shows only the snippets added through the Admin UI. You must use the Fastly API to manage custom snippets added through the API.
Delete the custom VCL snippet
You can delete custom VCL snippet code from your Fastly configuration by uploading an empty version of the snippet from the Magento Admin UI, or delete it completely using the Fastly API.
-
Upload an empty version of the snippet file to Fastly to remove the VCL logic from the active VCL version:
- Edit the snippet and delete the VCL snippet content.
- Save the configuration.
- Upload the VCL to Fastly to apply your changes.
-
Use the Fastly API Delete custom VCL snippet operation to delete the snippet completely, or submit a Magento support ticket to request deletion.
Instead of manually uploading custom VCL snippets, you can add snippets to the $MAGENTO_CLOUD_APP_DIR/var/vcl_snippets_custom directory in your environment. Snippets in this directory upload automatically any time you click upload VCL to Fastly in the Admin UI. See Automated custom VCL snippets deployment in the Fastly CDN module for Magento 2 documentation.